
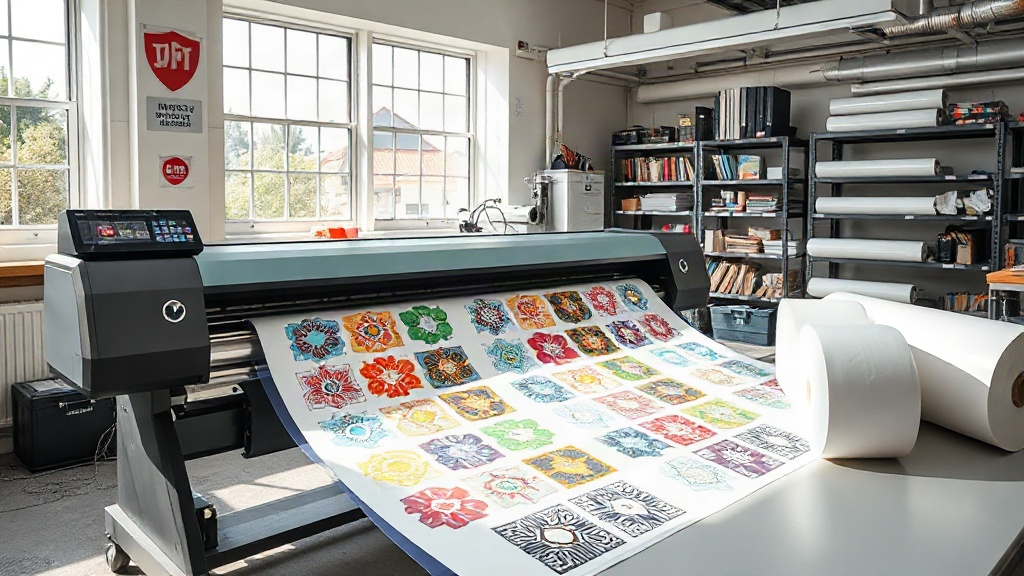
If you run a print shop or an apparel brand, you already know that DTF (direct to film) transfers have changed the game for small-batch and full-color printing. What many people overlook is the DTF gangsheet. This single sheet packs multiple designs onto one film, and it is one of the most effective ways to lower your per-transfer cost without sacrificing quality. Whether you are printing ten shirts for a local team or five hundred for an online store, understanding how a DTF gangsheet works will save you time and money.
What Exactly Is a DTF Gangsheet?
A DTF gangsheet is a large sheet of transfer film that holds several individual designs arranged together. Instead of printing one design per sheet, you nest many designs side by side to fill the available space. Once printed, the sheet is powdered with hot-melt adhesive, cured, and then either used as a whole or cut apart into individual transfers.
The term "gang" comes from the printing industry practice of ganging up multiple jobs on one plate or sheet. In DTF printing, this approach is especially valuable because film and ink are your two biggest consumables. A well-planned DTF gangsheet can reduce film waste by 30 to 50 percent compared to printing each design separately.
Why Print Shops Love Gangsheets
- Lower material cost: One large sheet uses less film and powder than many small sheets.
- Faster production: You load the printer once and produce dozens of transfers in a single pass.
- Consistent quality: All designs on the sheet go through the same curing and powdering cycle, so colors and adhesion stay uniform.
- Easy organization: You can group transfers by order, size, or customer, which simplifies packing and shipping.
How DTF Gangsheet Printing Works Step by Step
The process is straightforward once you understand the workflow. Here is what happens from file to finished transfer.
1. Prepare and Nest Your Artwork
Start with high-resolution PNG files that have transparent backgrounds. Open your RIP software or a dedicated gangsheet builder and import each design. The software lets you drag, rotate, and nest designs to minimize empty space. Leave at least 0.25 inches between designs so you can cut them apart cleanly later.
Pay attention to the total sheet width your printer supports. Common widths are 13 inches, 16 inches, and 24 inches. A 24-inch wide by 36-inch long sheet gives you 864 square inches of printable area, which is enough for roughly 20 to 40 medium-sized transfers depending on design size.
2. Print on DTF Film
Load the film into your DTF printer with the matte side facing the print head. The printer lays down a layer of white ink first, then the color layers on top. White ink is critical because it makes the colors opaque when transferred to dark garments. If your printer uses a different ink order, follow the manufacturer's profile.
3. Apply Hot-Melt Powder
While the ink is still wet, sprinkle hot-melt adhesive powder evenly across the printed area. Shake off the excess and return it to your container for reuse. The powder sticks only to the wet ink, which is why precise printing matters.
4. Cure the Sheet
Place the powdered film in a curing oven or under a heat press at 320 to 340 degrees Fahrenheit for 2 to 3 minutes. The powder melts and forms a flexible adhesive layer. Overcuring makes the transfer brittle, so use a timer and check your oven's actual temperature with an infrared thermometer.
5. Cut and Store
Once cooled, cut the DTF gangsheet into individual transfers. Store them in a dry, dust-free container. Properly cured transfers keep for six to twelve months, though most shops use them within weeks.
Designing Files That Work on a Gangsheet
Not every design belongs on a gangsheet. Very large prints, such as full-back graphics, may take up most of the sheet and leave little room for nesting. Small logos, left-chest prints, sleeve designs, and name tags are ideal candidates because they fill gaps efficiently.
Keep these file guidelines in mind:
- Resolution: 300 DPI at final print size.
- Color mode: RGB for most RIP software, though some workflows prefer CMYK.
- Background: Transparent PNG; avoid white boxes behind logos.
- Bleed: Add a 2 to 3 pixel transparent border around fine details to prevent ink spread.
If you are ordering gangsheets from a supplier, ask for their template file. It shows the exact printable area and safe margins so your designs do not get clipped.
Cost Breakdown: Why Gangsheets Save Money
Let us compare a simple scenario. Suppose you need 50 transfers that are each 3 inches by 4 inches.
Printing individually: 50 sheets of 8.5 by 11 inch film. Each sheet costs about $0.60 in film and ink, plus powder and labor. Total material cost: roughly $30 plus significantly more labor time.
Printing as a DTF gangsheet: You fit all 50 transfers on two 13 by 19 inch sheets. Film and ink cost about $4 per sheet, so $8 total. Powder adds maybe $1. Labor drops because you handle two sheets instead of fifty. The savings are dramatic, often 60 to 70 percent on consumables alone.
For shops that sell custom apparel, that margin difference decides whether a small order is profitable. A DTF gangsheet turns a break-even job into a money-maker.
Common Mistakes to Avoid
Overcrowding the Sheet
Packing designs too tightly makes cutting difficult and increases the risk of damaging edges. Leave breathing room between transfers.
Ignoring White Ink Density
Thin white ink layers look great on white shirts but wash out on dark colors. Test your white ink settings on black fabric before committing to a full gangsheet.
Skipping the Powder Test
Different powders melt at different temperatures. Run a small test strip before powdering an entire sheet. A transfer that peels after five washes usually traces back to undercured powder.
Forgetting About Fabric Types
DTF transfers work on cotton, polyester, blends, and even canvas. However, stretchy fabrics like spandex need a slightly lower press temperature and a longer press time to prevent the transfer from cracking.
Pressing a DTF Transfer Correctly
Even a perfect gangsheet fails if you press it wrong. Set your heat press to 300 to 320 degrees Fahrenheit with medium pressure. Pre-press the garment for 5 seconds to remove moisture. Place the transfer on the fabric, cover it with a Teflon sheet or parchment paper, and press for 10 to 15 seconds. Peel the film while it is still warm for a matte finish, or let it cool for a glossy look.
After pressing, wait 24 hours before washing. Turn the garment inside out and use cold water. Avoid fabric softener, which can break down the adhesive over time.
Frequently Asked Questions
How many designs can fit on one DTF gangsheet?
It depends entirely on design size and sheet dimensions. A 13 by 19 inch sheet might hold 8 to 12 medium logos, while a 24 by 36 inch sheet can hold 40 or more small transfers. Nesting software helps you maximize every square inch.
Can I mix different designs on the same gangsheet?
Yes, and that is one of the biggest advantages. You can combine logos, names, numbers, and artwork for multiple customers on a single sheet. Just keep track of which transfer belongs to which order by labeling sections before you cut.
What film thickness should I use for gangsheets?
Most shops use 75 to 100 micron film. Thinner film (75 micron) gives a softer hand feel and works well for detailed designs. Thicker film (100 micron) is more durable and easier to handle during powdering, which helps when you are producing large gangsheets.
How long do DTF gangsheet transfers last after printing?
Stored properly in a cool, dry place away from direct sunlight, cured transfers last six to twelve months. Humidity is the main enemy because it can make the powder tacky and cause transfers to stick together.
Do I need a special printer for gangsheets?
Any DTF printer can produce gangsheets. The key is your RIP software or gangsheet builder, which handles the nesting and layout. Some printers come with built-in software, while others rely on third-party tools.
Final Thoughts
Mastering the DTF gangsheet is one of the fastest ways to improve your shop's efficiency and profitability. By nesting designs carefully, controlling your white ink and powder process, and pressing transfers correctly, you can deliver durable, vibrant apparel that customers love. Start with small test sheets, refine your workflow, and scale up as you gain confidence. The savings and speed are worth the effort.